

How To Repair A Hole In Rubber Sprinkler Hose
Bert spent 25 years working as a home-improvement and residential construction contractor in key Florida.
Merely equally there is with many problems in life, at that place is more than than one way to gear up a broken sprinkler pipe. The appropriate method depends on the damaged department's location. For instance, a clean break before the valve usually requires a hard pipe repair, while easier repair methods piece of work fine when the damaged area occurs after the valve.
This guide will break down 5 different methods to repair a cached sprinkler pipe.

Geysers often erupt when a sprinkler piping breaks before the zone valve.
https://www.flickr.com/photos/scotnelson/
Locate and Expose the Damaged Piping
Finding the leak is sometimes the most hard part of this project. Plainly some leaks are easier to find than others, such equally a geyser that rips through the soil. In less obvious cases, a homeowner may just notice a pressure level loss at the stop of a zone. In this situation, plough on the leaking zone. Stand back and compare the spray height of each sprinkler caput. If you come across a loss in water pressure between two sprinkler heads, suspect a leak betwixt these 2 heads. Go to the suspected surface area and look for overly saturated soil.
Remove the soil covering the broken sprinkler pipe with a shovel. When the tool'southward blade touches something hard, stop digging with the shovel and expose near a ii-foot-long section of the pipe with either your manus or small trowel. Clear a 4- to six-inch deep trench under the sprinkler line. This gives the water inside the pipe a place to drain.
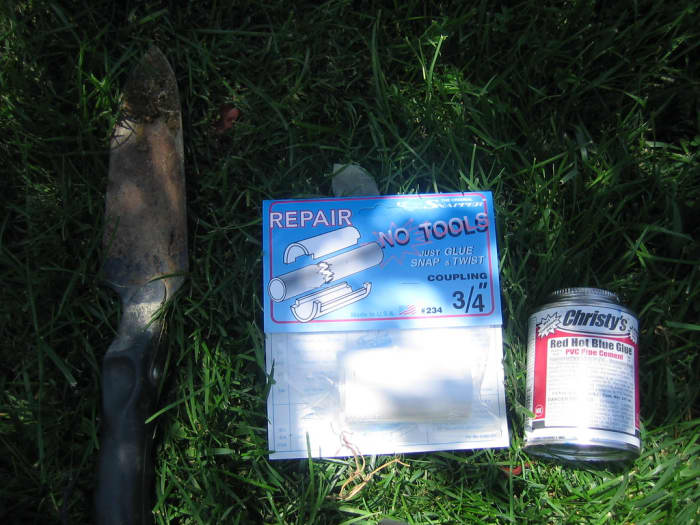
Identify the piping size before shopping for repair fittings. The person at the hardware store does not know what size pipe you lot accept. Manufacturers impress the pipe size on the side of the pipe. Unfortunately this is often difficult to read when on older buried pipe. If this is the case, wrap a piece of string around the pipe and make a mark where the end meets. Go the hardware store and use the string to place the pipe size. If you experience the need to gamble on piping size, choose 3/4 inch.
A saddle repair kit seals cracks or punctures in a PVC pipe without cut out the damaged section.
https://www.flickr.com/photos/phuson/
Saddle Repair Kit
Irrigation repair technicians employ a saddle repair kit to fix a cracked department of direct piping, such as when someone punctures a sprinkler pipe with a shovel. The pieces in these kits hug pipe, not fittings; leaking fittings require a hard pipage repair. Some kits utilize a PVC saddle and cement, while others use a prophylactic gasket and metal clamps.
PVC Saddle style
- Wipe the damaged area with a rag to remove mud and dry information technology. If water continues to seep from the break, turn off the h2o source and remove the closest sprinkler head. This releases the water pressure from the piping.
- Paint the pipe with a PVC cleaner or primer. Using a PVC cleaner or primer helps ensure the repair kit bonds permanently onto the pipe.
- Apply a liberal amount of cement to both the pipe and the repair kit.
- Position the kit's pieces over the damaged area and snap them together. Allow the cement dry, using the time recommended by kit manufacturer as a guide, earlier leak testing.
Clamp Manner
- Clean the surface of the damaged pipe with a rag. Remove all dirt and debris.
- Slip the clamp over the damaged area of the pipe. Position the clamp'southward rubber gasket over the damaged surface area.
- Assemble the clamp. Tighten the clench's bolts with the right sized wrench. Turn on the water source to bank check for leaks.
Scroll to Continue
Read More than From Dengarden

A pre-assembled flexible coupling
Flexible Coupling
Many homeowners love the copse in their g. Unfortunately, as the roots grow, they push up on any irrigation pipes running above them. Eventually the tension causes the pipe to fissure and leak. The root'southward upwardly forcefulness creates uneven pipes that sit at odd angles to each other, making a hard pipe repair difficult. To make matters worse, removing the offending root can harm or kill the tree. A flexible coupling solves this issue without cutting the roots.
- Lay the flexible coupling on the damaged pipage and centre information technology over the split in the pipage. Utilize the coupling to determine where to cut the pipe and marking the pipe with a pencil at the appropriate spots.
- Cut pipe on the pencil marks with PVC cutters. Remove whatever burrs with a knife.
- Let the h2o drain from the pipage. Dry and clean both ends of pipe with a rag.
- Utilise a liberal amount of wet-or-dry PVC cement to the both ends of the flexible coupling and the sprinkler pipe. Quickly motion to the next pace.
- Skid both ends of the coupling over their corresponding pipe ends. Twist the coupling back and forth about 1/4 to 1/ii turn. Let the cement dry, using the manufacturer'south instructions as a guide, then leak test the repair.

Some technicians use a PVC compression plumbing fixtures every bit a no-cement repair fitting.
Pinch Coupling
Irrigation repair technicians looking for a no-glue fitting often choose to apply a PVC compression coupling, sometimes called a dresser coupling. A PVC compression fitting uses rubber gaskets every bit a mechanical sealant. When the technician tightens the fitting's nuts those nuts force the rubber rings into the void between the pipe's outer surface and the fitting. If the fitting leaks, the technician simply tightens the nut another half turn. Unfortunately, a PVC dresser fitting should not be used on a constant force per unit area pipe, such as the pipe feeding the valve. In that case, option a different repair method.
- Remove about ii inches of pipe. This cutting does not need to be exact, just shut.
- Slide both dresser nuts over their respective ends of the piping.
- Work both prophylactic bushings onto their respective piping ends. Push ane rubber bushing well-nigh v inches away from the cut end of the pipe. Position the second rubber bushing nearly ane inch from the stop of its pipe.
- Sideslip one terminate of the dresser coupling over the pipe with the bushing placed v inches from the stop. Continue to adjust the fitting until the gratuitous end clears the remaining pipe.
- Position the end of the compression fitting confronting the condom bushing that sits one inch away from the pipe. This should eye the coupling over the two-inch gap.
- Slide the distant bushing toward the coupling until information technology touches the fitting. Both rubber bushings should now touch the plumbing equipment. Tighten both nuts with a wrench.
- Turn the water pressure on and leak examination. If the fitting leaks, place i wrench on the coupling and a 2d on the leaking nut. Concord the coupling nevertheless and plough the nut approximately one one-half plow. Repeat as necessary.

An expandable coupling works well in tight spaces.
Expanding Coupling
An expanding coupling, sometimes called a scope coupling, works well when replacing a leaking fitting located in a tight infinite, such as inside a valve box. The stationary end of this plumbing fixtures attaches straight to a section of pipe and the plumbing fixtures's movable shaft slides into another pipe fitting. Occasionally a repair technician completes a hard-pipe repair with an expandable coupling; notwithstanding, this state of affairs rarely happens due to the fitting's high cost.
- Fully expand the coupling and measure out its length. Subtract two inches from the measurement and transfer the calculation to the leaking sprinkler pipe.
- Cut the sprinkler line at the appropriate spot with PVC cutters. Let the h2o draining from the pipe absorb into the ground before continuing.
- Wipe the PVC pipe in the repair area with a dry rag. Removing all the dirt and debris from the pipage helps ensure a leak-gratis connection.
- Attach a PVC plumbing fixtures to the end of the pipe that accepts the expanding coupling'south shaft. The type of fitting depends on the repair. If the shaft connects to a threaded valve port, coat a male plumbing fixtures's threads with thread tape before installing it on the valve. If the shaft slides into a coupling or other fitting, apply PVC cement to both the pipe and fitting. Install the fitting on the pipe, using a twisting motion.
- Fully compress the expanding coupling.
- Apply cement to both the PVC pipe and the expandable plumbing equipment's coupling end.
- Mount the expanding coupling onto the pipage, using a twisting motion. The twisting move blends the cement.
- Encompass the shaft'due south mating end and its plumbing equipment with PVC cement. Quickly slide the shaft into the plumbing equipment. Rotate the shaft back and forth slightly. Follow the cement manufacturer'southward recommended curing fourth dimension before leak testing.
Hard Pipe Span
Occasionally it makes sense to build a difficult pipe span using PVC pipe and fittings, such as when a sprinkler line passes over multiple growing tree roots or when the leak is located in an expanse too small for other methods. The exact type and corporeality of fittings needed depends on the situation, however, most pipe bridges use four 90-degree fittings and a section of pipe.
- Dig a ditch beyond the entire repair surface area. This exposes all obstacles.
- Cut the pipe on both ends of the repair with PVC cutters. Let the h2o drain from the pipe and soak into the soil. Dry and clean the pipe ends with a dry rag.
- Attach a 90-degree fitting to one cached sprinkler pipe with PVC cement. Turn the plumbing fixtures until its open port faces up. Repeat this on the other buried pipage. Both 90-caste fittings must face the same direction.
- Cut two risers from a length of PVC pipe. The length of the risers depends on the amount of height needed to clear the obstacle. Information technology sometimes helps to lay a flake piece of pipe on the obstacle in the trench and measure the distance from the bottom of the scrap to the top of the buried pipe. Try to keep the risers every bit pocket-sized as possible. Cement a 90-degree fitting onto each riser.
- Measure out the length of the removed section of pipe. Transfer this measurement to a new piece of pipe and cut at the appropriate spot.
- Attach one of the xc-degree fitting on 1 riser to the new pipe with PVC cement. Cement the 90-degree fitting on the remaining riser to the pipage's other end. Twist the ninety-degree fitting until the 2nd riser's position matches the offset.
- Use a liberal amount of PVC cement to both of the 90-degree fittings connected to the buried sprinkler pipe. Position the bridge in the trench and sideslip a riser into each cached fitting. Press the risers into their respective fittings. Let the cement cure completely before leak testing.
This article is accurate and true to the best of the author'southward knowledge. Content is for informational or entertainment purposes just and does not substitute for personal counsel or professional advice in business, financial, legal, or technical matters.
© 2022 Bert Holopaw

How To Repair A Hole In Rubber Sprinkler Hose,
Source: https://dengarden.com/home-improvement/How-to-Repair-a-Buried-Sprinkler-Pipe
Posted by: goldbergexpromen.blogspot.com
0 Response to "How To Repair A Hole In Rubber Sprinkler Hose"
Post a Comment